New to ContractSafe? Here's a quick way to get started!
ContractSafe was designed to let users like you:
- Find what you are looking for quickly, even within scanned documents.
- Make sure you are reminded of key contract dates.
- Create reports with the information you need.
- Collaborate with co-workers.
This guide will help you quickly upload and set up your first contracts.
You can also get more help by selecting Support under the Settings icon at the top right of every ContractSafe page, or feel free to contact us directly via chat on the site or at support@contractsafe.com.
For Account Owners, Admins, and Account Managers only: You get special permissions! View your Quick Start Guide.
Let’s get started!
Getting started with your first contract
1) Set up your password and log into your ContractSafe account.
You were sent an email invitation from ContractSafe to create a user account. Click on the link in the email to set your password. For security reasons, invitation emails expire after 24 hours. If your invitation has expired or you did not get it, please ask your account administrator to re-send it to you. You are the administrator? Email our Support Team.
2) Upload a contract into your account.
There are three ways to upload contracts into ContractSafe.
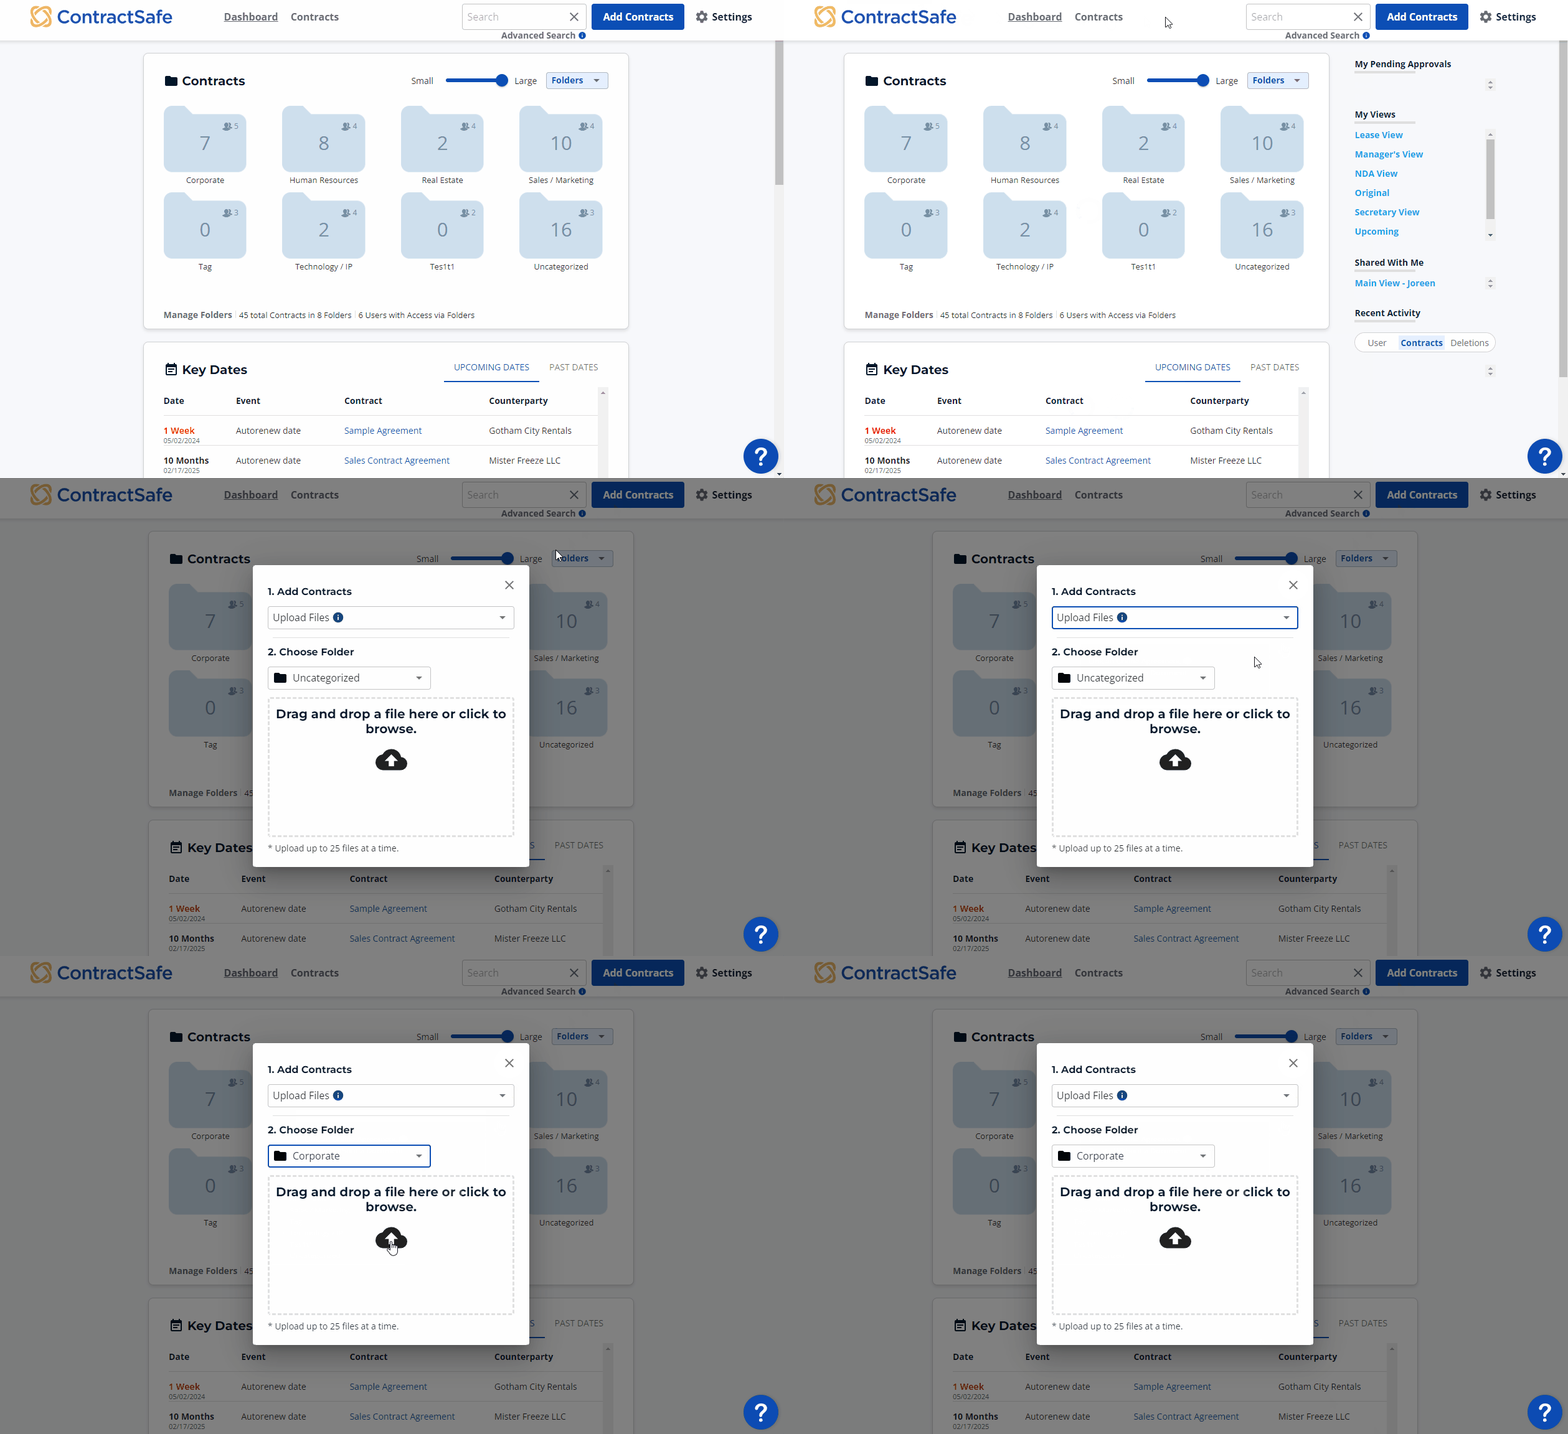
- Log in and select Add Contracts at the top of any page in ContractSafe. Then, from Choose Folder, select a folder from the dropdown menu. Next, you can choose the contract from your computer or drop it into the box where indicated.
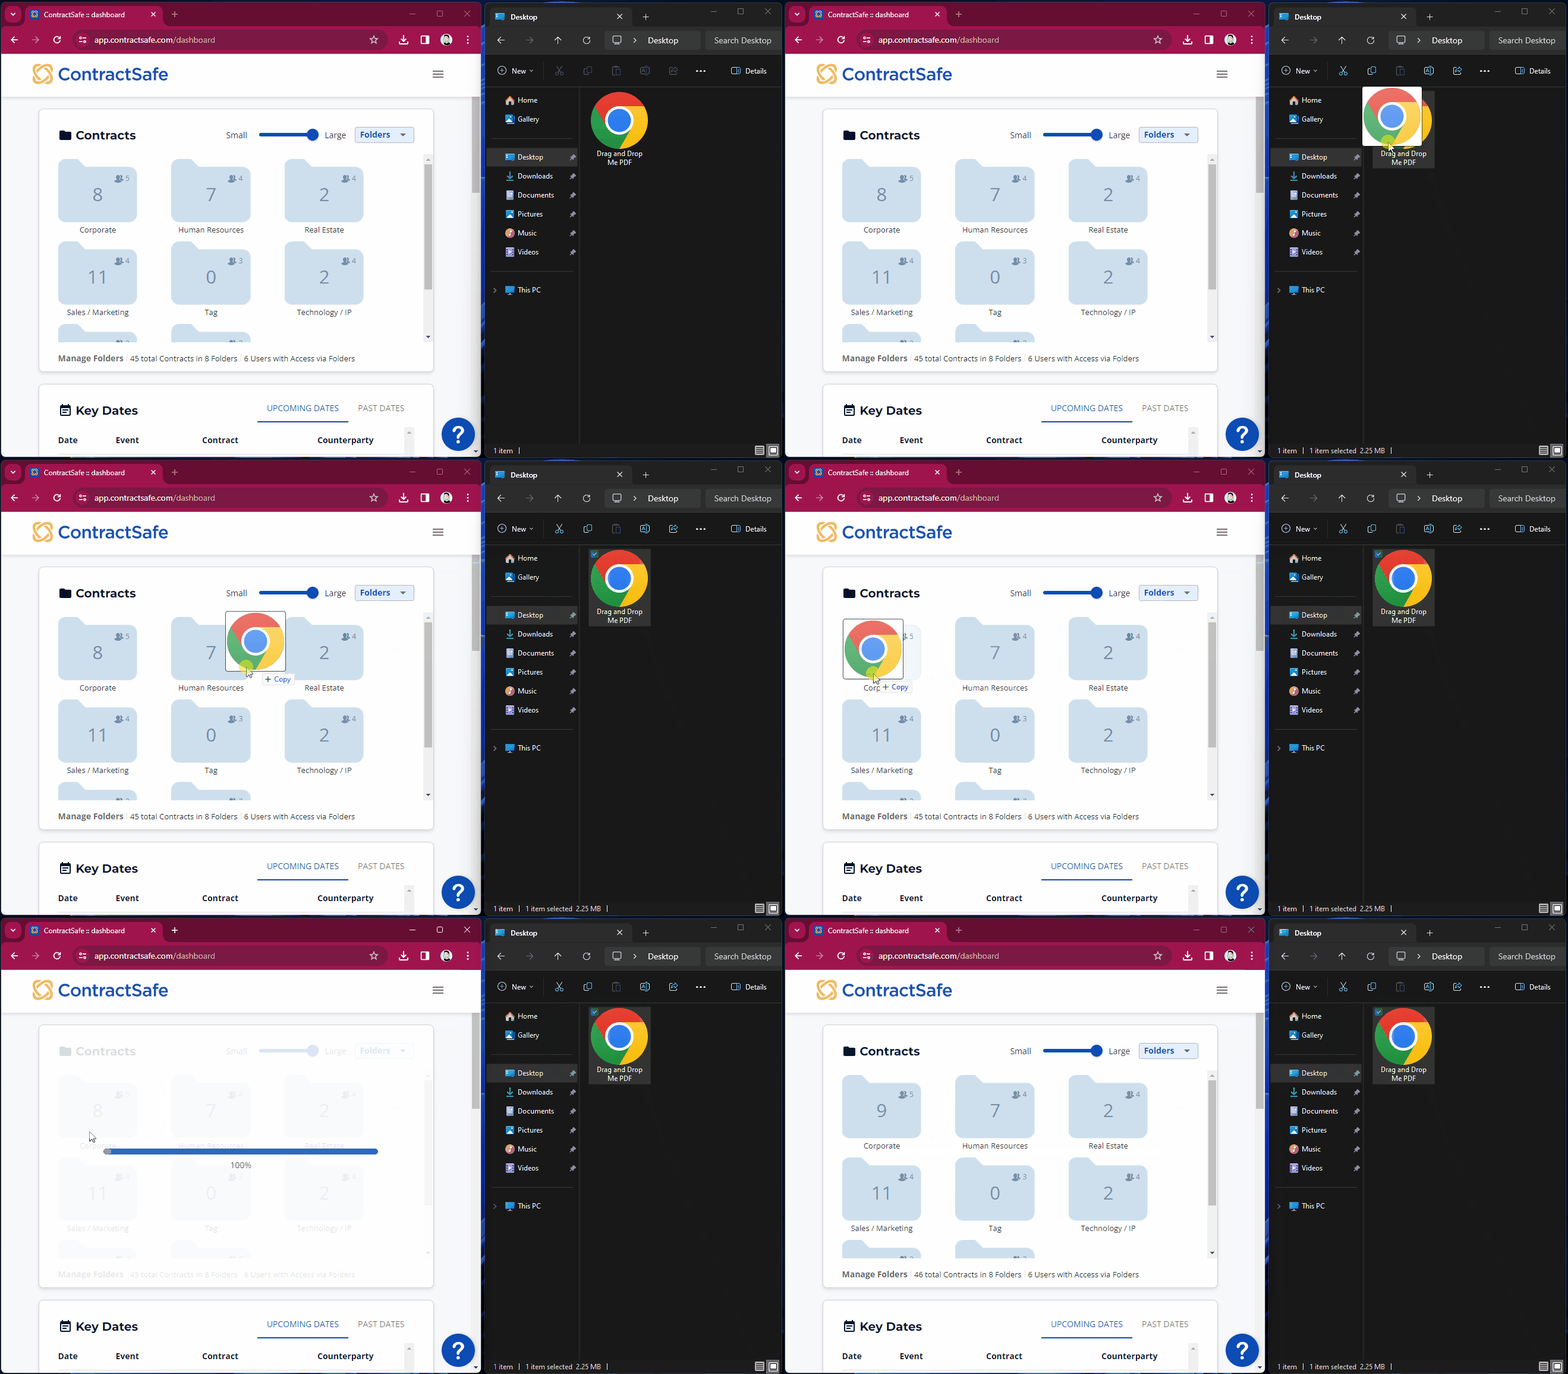
- Visit the Dashboard and make sure you have the Folders section open (instead of Tags or Counterparties). Locate the contract you’d like to open on your computer. Drag and drop it right into a folder. It sounds simple because it is! You are just dragging and dropping a document into a folder within seconds.
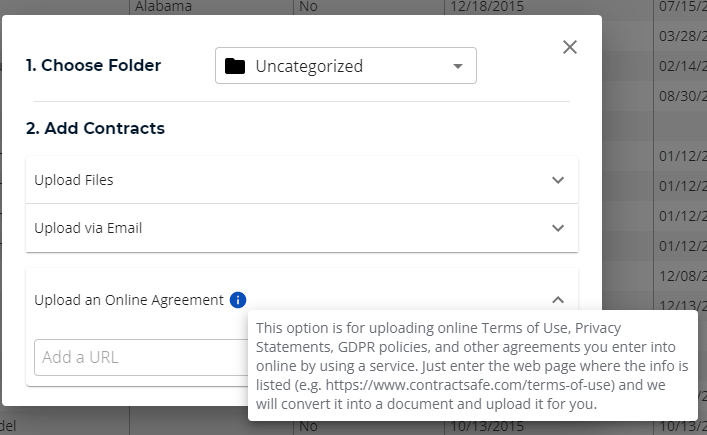
- Email contracts directly into your account (our favorite). You can see your account’s email address by clicking Upload Via Email in the Add Contracts pop-up window. You can also find your “Email In” Address in your Email Settings. Any email attachments sent to this address will automatically be uploaded to your account. You can also upload directly into a folder by typing Folder=___ (fill in the blank with your Folder name) at the end of your email subject line to have ContractSafe automatically assign the folder.
If you have a scanner that can send emails, add your ContractSafe email address and then scan and send contracts directly into your ContractSafe account!
- You also have the option to upload online agreements!
3) Find your newly uploaded contract.
After logging in, select Contracts at the top of the page. This is where all your contracts are listed. Newly uploaded contracts will appear at the top of your Contract List and be highlighted in bold. Select a contract (by clicking on it) for more detailed information.

You can use the search bar at the top right of any page to find any contract with a quick, Google-like keyword search.
Now, onto the Contract Page.
Navigating the Contract Page
1) Change contract Names, assign Folders, and add Tags.
[AI]ssistant (our AI tool) will guide you in accepting and automatically adding critical contract data. If not, you will be sent directly to the Contract Page, where you can enter and see all the critical information for your contract and the contract itself in the Viewer on the right side of the page.
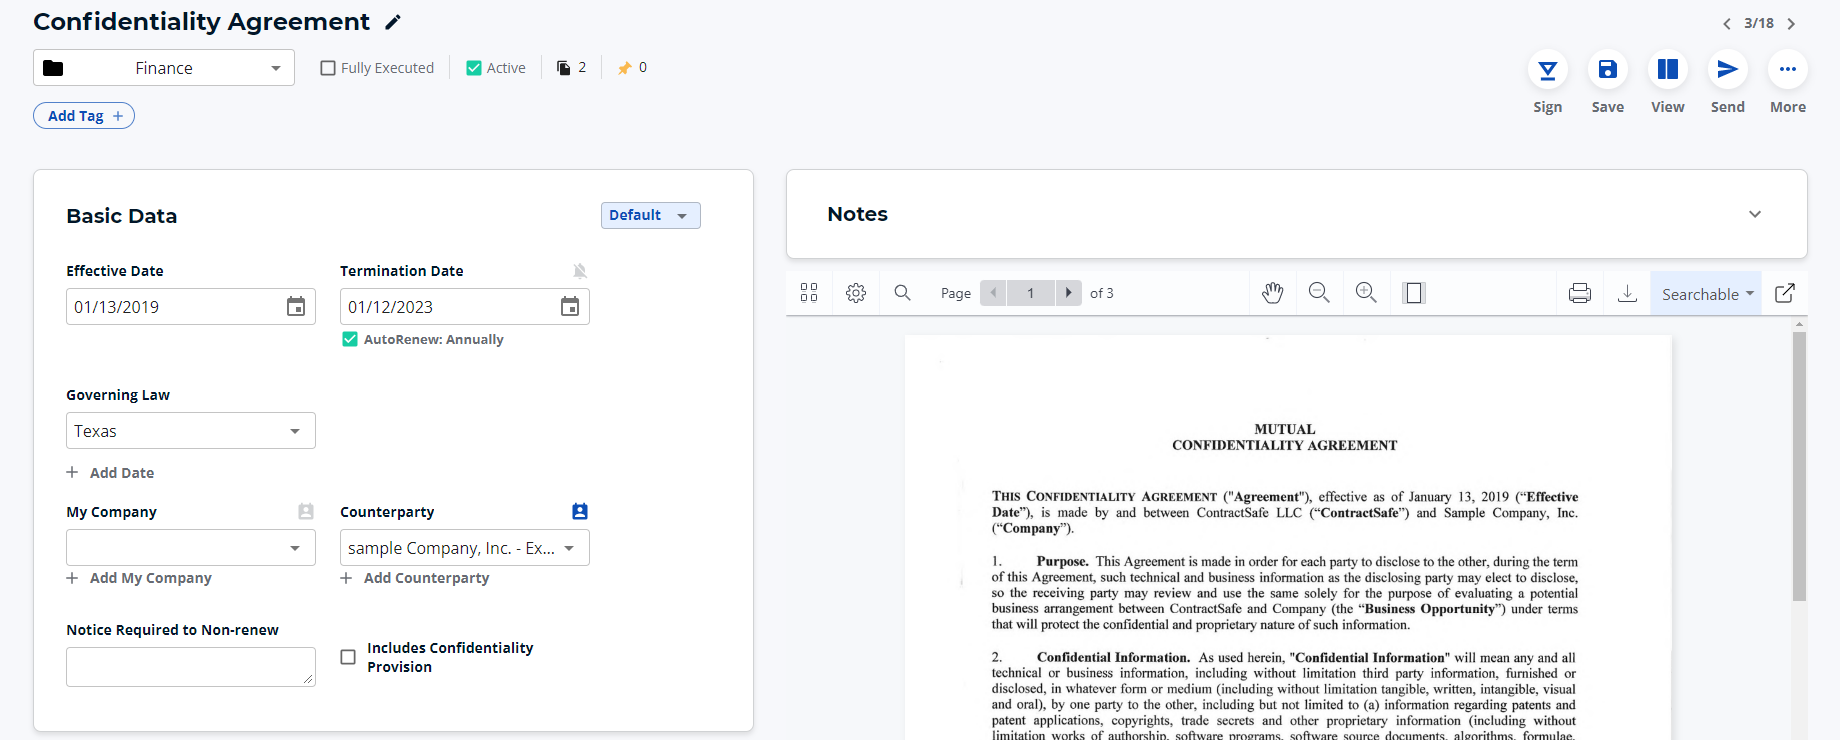
You can enter any information you want to track on the Contract Page. You may want to start by changing the name of the contract. Click the pencil icon and type a name, as shown in the image below. Do you want to put your contract in a different folder? Select the folder you’d like by clicking the black Folder icon under the contract name. If you don’t see the Folder you’d like when you select the drop-down arrow, one of the Admin users for your account can add more Folder options.
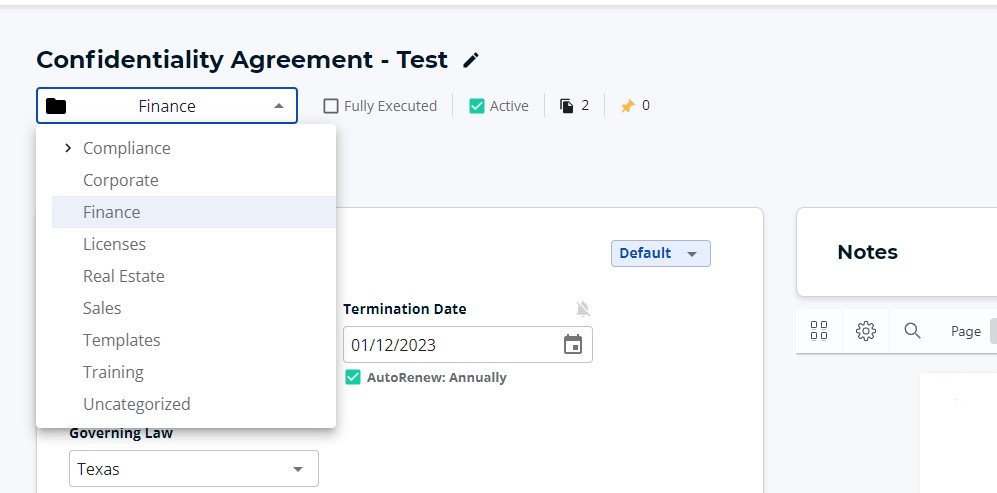
You can also add other important information like Parties, Value, Account, and Tags.
2) Enter the Effective Date and Termination Date.
Enter the Effective Date and Termination Date where indicated. You can also choose "Set reminder" to add email reminders. See: How to Create Custom Dates and Add Reminders.
3) Create custom Saved Views.
There is the option to create Saved Views to show more or less columns on the Contract List Page. This option is available at the Standard subscription level and above.
Create a new view from the Contract List Page by selecting the Actions box located in the upper right corner.
Pick and choose which columns you’d like to display from the list shown above. By default, columns are set to: Folder, Name, Value, Counterparty, Effective Date, and Termination Date; They can be removed and moved up or down so you can choose the order you’d like the columns displayed in. So … the look of your page will vary depending on what you set your Saved Views as since views are customizable. Here’s one example!

For Account Owners, Admins, and Account Managers only: You can configure views for your team members by sharing your newly created Views. You can learn how to share a view. You can also create Saved Views for your entire organization, as noted in the Admin Quick Start Guide.
And that’s it! Those are the basics for getting started with your new contract management software.
You’ll get email reminders in advance of the contract termination, so you’ll never be surprised by a contract ending or renewing! And you’ll have this information available to you and your colleagues for quick reference whenever and wherever it is needed.
If you need further assistance, please reach out to support@contractsafe.com
